New Classic Compute Policies: Prevent Overspending
Picture this: your data scientists spin up an interactive 64-worker A100 GPU cluster for a simple 5-minute task, then forget about it. With Databricks' default auto-termination set at 4,320 minutes (72 hours), that mistake could cost you around $150,000 – enough to buy an apartment in some cities.
While Azure quotas provide some protection, they're not foolproof. Fortunately, Databricks has improved how we configure compute policies, making cost controls more transparent and accessible. Let's explore how to set up bulletproof policies that protect your budget without hampering productivity.

Step 1: Remove Policy Exceptions
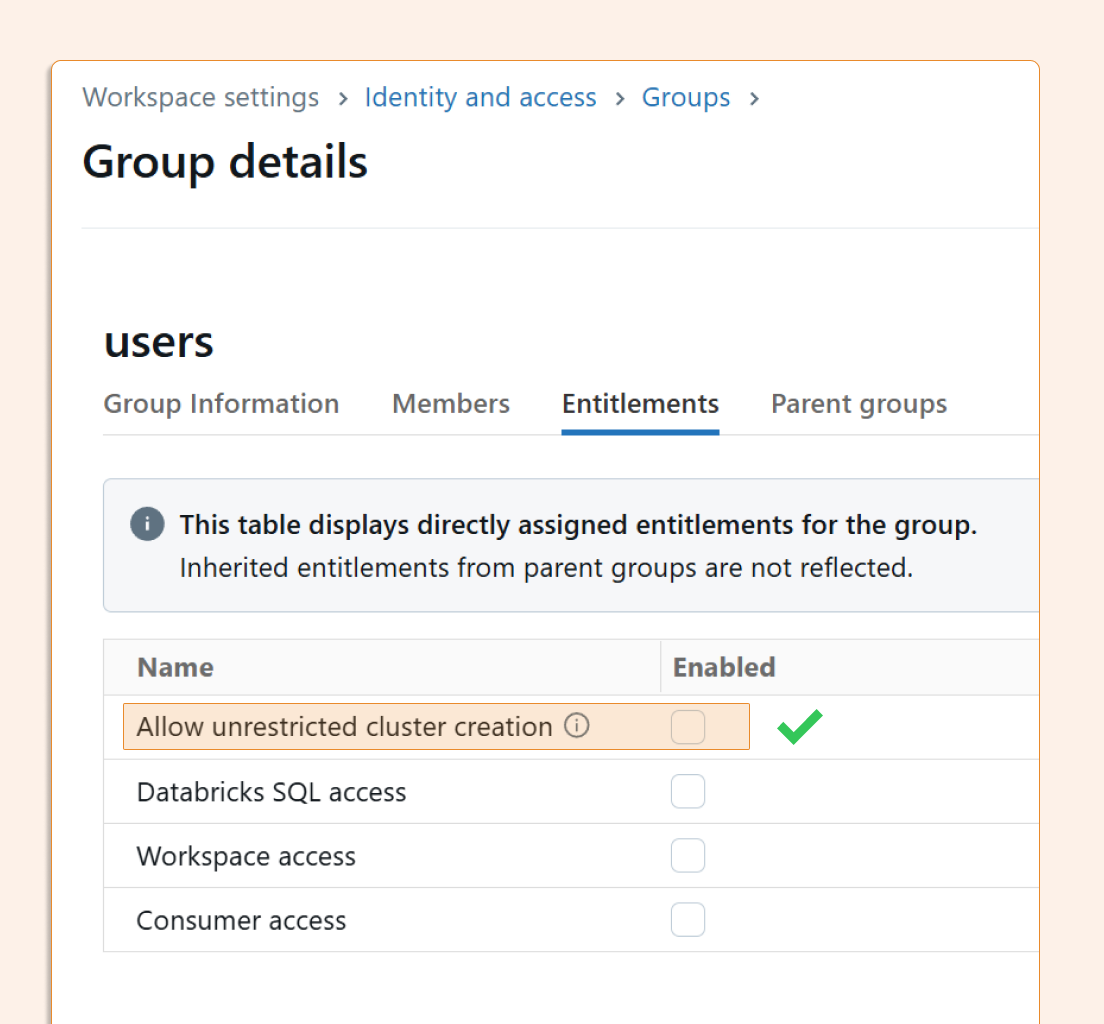
A policy is only as strong as its enforcement. The first step is disabling "Unrestricted cluster creation" permissions for users and groups who shouldn't have them.
Navigate to Workspace Settings > Identity & Access and review both user and group-level permissions. Remember that permissions can be granted at multiple levels, so check both carefully.
Pro tip: Even advanced users rarely need unrestricted access. Consider creating specific exception policies instead of blanket permissions.
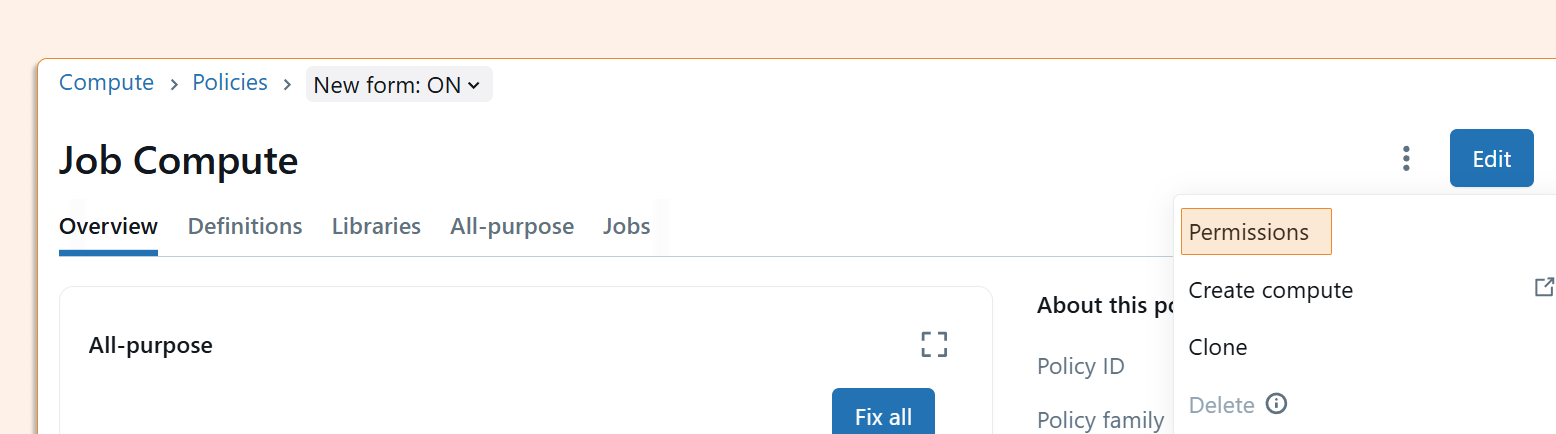
Step 2: Define Policy Access Rights
Next, determine who can use each compute policy. In the Compute section, you'll find your policies and can assign access permissions accordingly.
Some organizations use shared clusters exclusively, while others need individual or team-specific policies. The key is being intentional about who gets what level of access.
Step 3: Configure Policy Rules
Once you've defined access rights, it's time to set the actual policy parameters. The new form-based interface makes this much more straightforward than before.

Critical Setting: Auto-Termination
The most important configuration is auto-termination for idle interactive clusters. Instead of the default 4,320 minutes, consider setting this to 10-20 minutes for most users. This single change can prevent the majority of cost disasters.
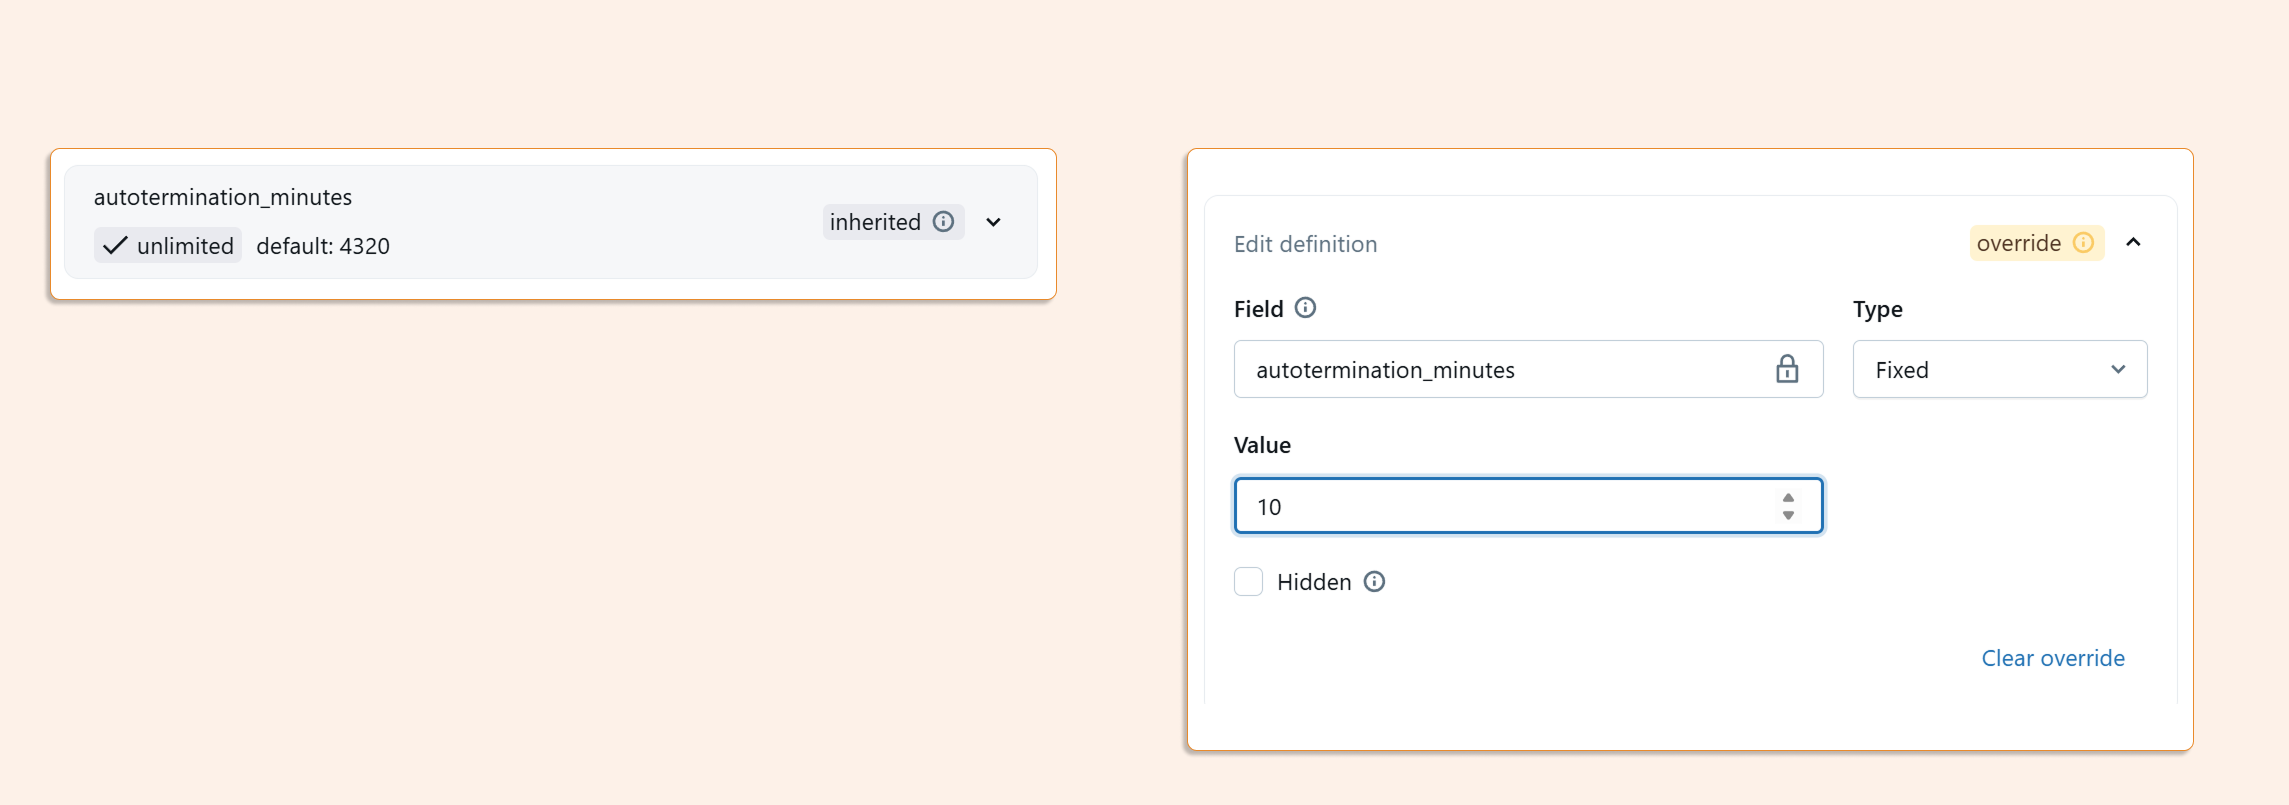
You can set restrictive values in several ways, including Fixed, Range, or an Allow/Disallow list.
You should ser auto termination lower than what’s needed to decide on a few other things, like the number of workers OR auto scaling min/max.

Or even allow just a single-node cluster:

And that compute time to exclude GPU type for those who don’t need it :-)

Usually, when we set policies, things are specified at runtime, like default runtime version, photon, etc.

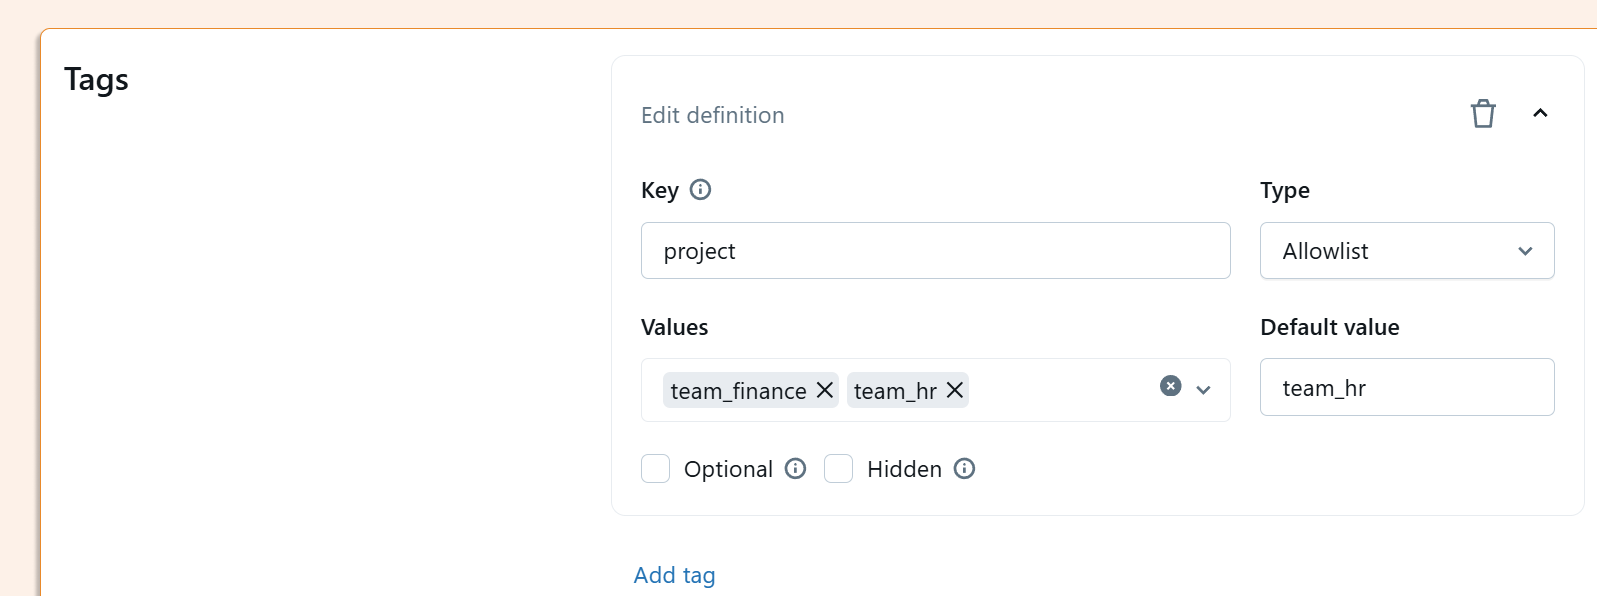
One last thing: it’s important to specify tags - for example, users have to be forced to select a tag related to the project name.
Step 4: User Experience with Policies
After implementing policies, users will only see options they're authorized to use during cluster creation. Fixed values appear as "locked" parameters, while configurable settings show only approved options.
This approach provides guidance without being overly restrictive, helping users make cost-effective choices by default.

Step 5: Infrastructure as Code
The new policy interface integrates well with Infrastructure as Code practices. You can easily export your policies to Terraform configurations, making them version-controlled and reproducible across environments.
Note: Databricks Asset Bundles support for policies is still in development, but Terraform export works seamlessly.

Handling Exceptions
Despite careful planning, legitimate use cases will arise that require more powerful compute resources. When this happens create a new policy for the user and discuss potential associated costs.
Key Takeaways
Smart Databricks compute policies are your first line of defense against cloud cost surprises. By setting reasonable defaults, removing bypass options, and maintaining flexibility for legitimate high-compute needs, you can dramatically reduce the risk of budget-busting mistakes.